Celebrate
This tutorial was written by Vivian Guerra : June 26, 2014.
Any similarities to another tutorial is purely coincidental.
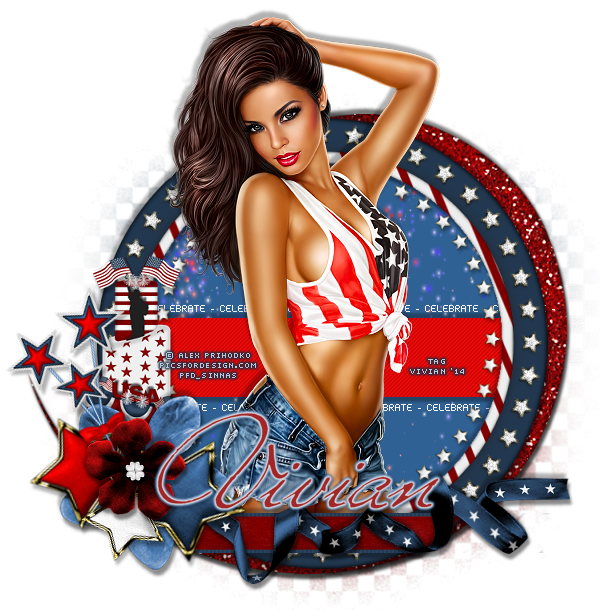
I am using the awesome artwork of Alex Prihodko for this tutorial.
Must have a license from PicsForDesign to use.
No translating without my permission.
Do not copy my tutorials.
Direct people to this site by link only.
•••••••••
SUPPLIES
PSP9 or above
Tube or one of your choice
EyeCandy 4000 - Gradient Glow
Scrapkit Celebration of Independence from
HorsePlay Pasture Designs
Mask of choice
Animation479 from Scrappy Bit of Fun
•••••••••
New Image
650x650
•••••••••
(Before we start: The finished tag will be animated.
I am unable to show a preview of the animated tag because of the background.
If you would like to see it please go here:
http://i61.tinypic.com/28jz890.jpg)
Open
COI_10
Copy each and paste onto your canvas.
Image - Flip
Image - Rotate counterclockwise 90
Resize
Open
COI_11
Copy and paste
Resize to fit over COI_10 but leave some of
COI_10 sticking out from beneath.
See my tag for reference.
Using your magic wand click inside of COI_11
Selections - Modify - Expand by 3
New Raster layer
Choose a color from your tube and fill this layer.
Drag below COI_11 but keep it above COI_10
•••••••••
Open
COI_15
Copy and paste
Resize to fit inside of COI_11
Above the filled layer.
•••••••••
Preset Shape - Rectangle
Using a color from your tube as the background,
draw out a long thing rectangle in the center of your frame.
Convert to Raster.
If any is sticking out from beneath, use your eraser tool to erase.
I added a texture.
Penta - Jeans
Using a pixel or font of choice
type out the word CELEBRATE in a line over the top
and bottom of your rectangle.
See my tag for reference.
•••••••••
Open
Tube
Copy and paste
Resize to fit and position in the center.
Open
COI_29
COI_30
Copy and paste each.
Resize and layer at the bottom of your tube.
Erase any part of the tube that is sticking out from beneath
COI_29 if needed.
•••••••••
Open
COI_23
COI_24
Copy each, resize COI_24 to make it smaller than COI_23
and layer them the side of your frame.
Open
COI_3
COI_6
COI_17
COI_18
COI_19
Copy and paste each.
Layer the stars around your flowers.
The building and star bunch I placed around the flowers as well.
Open a paper of your choice
and apply your mask.
Add your name and copyright info.
I added a Gradient Glow but this is optional
Add a drop shadow to your layers.
•••••••••
To animate:
Open the .psd file of the animation in Paint Shop.
You should have 6 layers
Make sure the bottom layer is selected.
On your tag select the layer you filled with the color from your tube.
Selection - Select All - Float - Defloat.
Make 6 new layers
Using each layer from your animation, paste into selection on your new layers in your tag.
Make sure you are selection the new animation layer each time
Once done with that close off your animation layers in your tag except for the first one.
Copy merged and paste into Animation Shop.
Repeat the steps, closing off the animation layers and pasting after each frame
as you go until you have them all pasted into your Animation Shop.
View Animation
And you are DONE!
•••••••••
Any similarities to another tutorial is purely coincidental.
I am using the awesome artwork of Alex Prihodko for this tutorial.
Must have a license from PicsForDesign to use.
No translating without my permission.
Do not copy my tutorials.
Direct people to this site by link only.
•••••••••
SUPPLIES
PSP9 or above
Tube or one of your choice
EyeCandy 4000 - Gradient Glow
Scrapkit Celebration of Independence from
HorsePlay Pasture Designs
Mask of choice
Animation479 from Scrappy Bit of Fun
•••••••••
New Image
650x650
•••••••••
(Before we start: The finished tag will be animated.
I am unable to show a preview of the animated tag because of the background.
If you would like to see it please go here:
http://i61.tinypic.com/28jz890.jpg)
Open
COI_10
Copy each and paste onto your canvas.
Image - Flip
Image - Rotate counterclockwise 90
Resize
Open
COI_11
Copy and paste
Resize to fit over COI_10 but leave some of
COI_10 sticking out from beneath.
See my tag for reference.
Using your magic wand click inside of COI_11
Selections - Modify - Expand by 3
New Raster layer
Choose a color from your tube and fill this layer.
Drag below COI_11 but keep it above COI_10
•••••••••
Open
COI_15
Copy and paste
Resize to fit inside of COI_11
Above the filled layer.
•••••••••
Preset Shape - Rectangle
Using a color from your tube as the background,
draw out a long thing rectangle in the center of your frame.
Convert to Raster.
If any is sticking out from beneath, use your eraser tool to erase.
I added a texture.
Penta - Jeans
Using a pixel or font of choice
type out the word CELEBRATE in a line over the top
and bottom of your rectangle.
See my tag for reference.
•••••••••
Open
Tube
Copy and paste
Resize to fit and position in the center.
Open
COI_29
COI_30
Copy and paste each.
Resize and layer at the bottom of your tube.
Erase any part of the tube that is sticking out from beneath
COI_29 if needed.
•••••••••
Open
COI_23
COI_24
Copy each, resize COI_24 to make it smaller than COI_23
and layer them the side of your frame.
Open
COI_3
COI_6
COI_17
COI_18
COI_19
Copy and paste each.
Layer the stars around your flowers.
The building and star bunch I placed around the flowers as well.
Open a paper of your choice
and apply your mask.
Add your name and copyright info.
I added a Gradient Glow but this is optional
Add a drop shadow to your layers.
•••••••••
To animate:
Open the .psd file of the animation in Paint Shop.
You should have 6 layers
Make sure the bottom layer is selected.
On your tag select the layer you filled with the color from your tube.
Selection - Select All - Float - Defloat.
Make 6 new layers
Using each layer from your animation, paste into selection on your new layers in your tag.
Make sure you are selection the new animation layer each time
Once done with that close off your animation layers in your tag except for the first one.
Copy merged and paste into Animation Shop.
Repeat the steps, closing off the animation layers and pasting after each frame
as you go until you have them all pasted into your Animation Shop.
View Animation
And you are DONE!
•••••••••
