Bittersweet
This tutorial was written by Vivian Guerra : March 2, 2014.
Any similarities to another tutorial is purely coincidental.
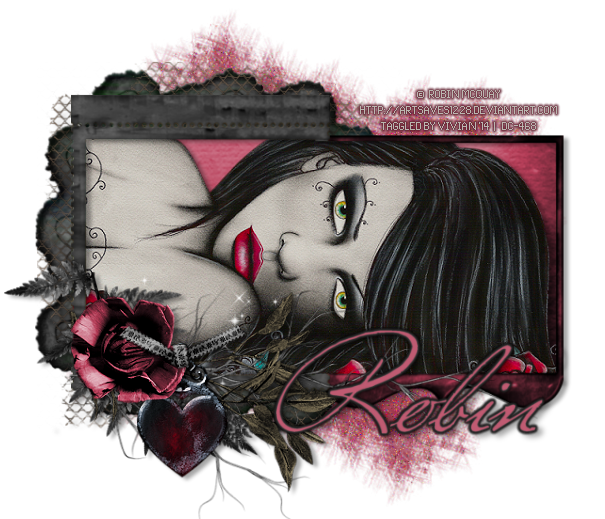
I am using the awesome artwork of Robin McQuay for this tutorial.
You must have a license to use.
No translating without my permission.
Do not copy my tutorials.
Direct people to this site by link only.
•••••••••
SUPPLIES
PSP9 or above
Tube or one of your choice
EyeCandy 4000 - Gradient Glow
Scrapkit The Darkest Night Sampler from Gothic Inspirations
Mask167 from Weescotslass
•••••••••
New Image
600x600
•••••••••
Open
Frame1
Frame3
Copy and paste each onto your canvas.
Resize each.
You want them to be pretty similar in size.
They need to fit next to each other.
(See my tag for reference)
Once this is done.
Use your selection tool to erase the bars that are in the center.
Merge the two layers.
I colorized the match my tube but this is up to you.
Copy and paste your tube.
Resize so it fits into your frame.
Erase any of the tube that is showing from around the frames edge.
Open
Paper2
Click inside the frame with your magic wand.
Selections - Modify - Expand by 3
Copy and paste your paper.
Resize and drag below your frame.
Selections - Invert - Delete - Deselect
Again, I colorized it to match.
•••••••••
Open
Tab
Mesh
Copy and paste.
Resize the Tab
Position to one side of your frame.
I chose the left
Repeat the steps with Mesh.
This layer goes either above or below the Tab.
Place where you think it looks best.
Open
Fern
Leaves
Moss
Copy and paste each onto your canvas.
Resize and position on your frame.
Using my tag as a reference you can see I rotated and colorized.
Layer the elements on top of each other.
•••••••••
Open
Rose
Charm
Knot
Sparkles
Copy each element and paste onto your canvas.
The Rose I placed above the foliage layers and colorized.
The Charm I resized and moved below the Rose but enough that it stuck out.
The Knot is above each of these layers, tying the Charm to the Rose.
The Sparkles I placed over the foliage layers.
Use my tag as a reference.
•••••••••
Choose a color from your tube.
Make a new layer all the way at the bottom.
Floodfill with the color.
Apply your mask.
Merge Group
I added some Noise.
If you want to do this step my settings were:
Random
Noise 20%
Monochrome unchecked.
•••••••••
Add your name and copyright info.
I added a Gradient Glow but this is optional
Add a drop shadow to your layers.
And you are DONE!
•••••••••
Any similarities to another tutorial is purely coincidental.
I am using the awesome artwork of Robin McQuay for this tutorial.
You must have a license to use.
No translating without my permission.
Do not copy my tutorials.
Direct people to this site by link only.
•••••••••
SUPPLIES
PSP9 or above
Tube or one of your choice
EyeCandy 4000 - Gradient Glow
Scrapkit The Darkest Night Sampler from Gothic Inspirations
Mask167 from Weescotslass
•••••••••
New Image
600x600
•••••••••
Open
Frame1
Frame3
Copy and paste each onto your canvas.
Resize each.
You want them to be pretty similar in size.
They need to fit next to each other.
(See my tag for reference)
Once this is done.
Use your selection tool to erase the bars that are in the center.
Merge the two layers.
I colorized the match my tube but this is up to you.
Copy and paste your tube.
Resize so it fits into your frame.
Erase any of the tube that is showing from around the frames edge.
Open
Paper2
Click inside the frame with your magic wand.
Selections - Modify - Expand by 3
Copy and paste your paper.
Resize and drag below your frame.
Selections - Invert - Delete - Deselect
Again, I colorized it to match.
•••••••••
Open
Tab
Mesh
Copy and paste.
Resize the Tab
Position to one side of your frame.
I chose the left
Repeat the steps with Mesh.
This layer goes either above or below the Tab.
Place where you think it looks best.
Open
Fern
Leaves
Moss
Copy and paste each onto your canvas.
Resize and position on your frame.
Using my tag as a reference you can see I rotated and colorized.
Layer the elements on top of each other.
•••••••••
Open
Rose
Charm
Knot
Sparkles
Copy each element and paste onto your canvas.
The Rose I placed above the foliage layers and colorized.
The Charm I resized and moved below the Rose but enough that it stuck out.
The Knot is above each of these layers, tying the Charm to the Rose.
The Sparkles I placed over the foliage layers.
Use my tag as a reference.
•••••••••
Choose a color from your tube.
Make a new layer all the way at the bottom.
Floodfill with the color.
Apply your mask.
Merge Group
I added some Noise.
If you want to do this step my settings were:
Random
Noise 20%
Monochrome unchecked.
•••••••••
Add your name and copyright info.
I added a Gradient Glow but this is optional
Add a drop shadow to your layers.
And you are DONE!
•••••••••
